Getting Started
This guide will walk you through the basic steps to setup a new Backrest instance.
Prerequisites
Before diving into configuration, you should have:
- Backrest installed and running on your system.
- Your storage provider credentials ready (if using remote storage).
- Access to Backrest via your browser (typically
http://localhost:9898).
Installation
Please refer to the GitHub README for platform-specific installation instructions.
Core Concepts
Let's understand some key terminology used within Backrest:
Restic Repository: The underlying storage location where your backup data is kept. While Backrest manages this for you, understanding this concept allows you to interact directly with your backups using the restic CLI if needed.
Backrest Repository: A configuration set in Backrest that defines:
- Where your backup data is stored
- Encryption credentials
- Backup orchestration settings
- Associated hooks and options
Backup Plan: A configuration that specifies:
- What local data to backup
- When to create snapshots
- How long to retain backups
- When to run maintenance operations
Key Operations:
- Backup: Creates a new snapshot of your data
- Forget: Marks old snapshots for deletion (without removing data)
- Prune: Removes unreferenced data to free up storage space
- Restore: Retrieves files from a snapshot to your local system
Initial Setup
INFO
After installation, access Backrest at http://localhost:9898 (or your configured port). You'll need to complete the initial setup process below.
1. Instance Configuration
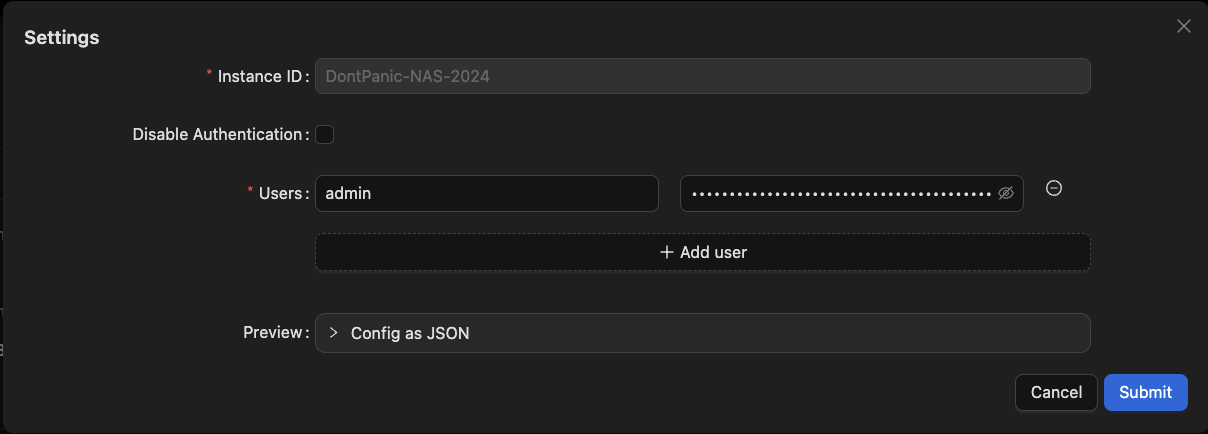
Instance ID
- A unique identifier for your Backrest installation.
- Used to distinguish snapshots from different Backrest instances.
- Important: Cannot be changed via the UI after initial setup.
Authentication
- Set your username and password during first launch.
- To reset credentials, delete the
"users"key from your configuration file and restart the Backrest service:- Linux/macOS:
~/.config/backrest/config.json - Windows:
%appdata%\backrest\config.json
- Linux/macOS:
- Authentication can be disabled for local installations or when using an authenticating reverse proxy.
2. Repository Setup
Click "Add Repo" to configure your backup storage location. You can either create a new repository or connect to an existing one.

Essential Repository Settings
Repository Name
- A human-readable identifier.
- Cannot be changed after creation.
Repository URI
- Specifies the backup storage location.
- Common formats:
- Backblaze B2:
b2:bucketorb2:bucket/prefix - AWS S3:
s3:bucketors3:bucket/prefix - Google Cloud:
gs:bucket:/orgs:bucket:/prefix - SFTP:
sftp:user@host:/path/to/repo - Local:
/mnt/backupdisk/repo1 - Rclone:
rclone:remote:path(requires rclone installation. See the Rclone documentation to configure remote backends).
- Backblaze B2:
Environment Variables
- Storage provider credentials:
- S3:
AWS_ACCESS_KEY_ID,AWS_SECRET_ACCESS_KEY - B2:
B2_ACCOUNT_ID,B2_ACCOUNT_KEY - Google Cloud:
GOOGLE_PROJECT_ID,GOOGLE_APPLICATION_CREDENTIALS
- S3:
- Storage provider credentials:
Optional Flags
- Common examples:
- SFTP key:
-o sftp.args="-i /path/to/key" - Disable locking:
--no-lock - Bandwidth limits:
--limit-upload 1000,--limit-download 1000
- SFTP key:
- Common examples:
Maintenance Policies
- Prune Policy: Schedule for cleaning unreferenced data.
- Check Policy: Schedule for backup integrity verification.
INFO
Once you've saved the repository, navigate to the Repository View and click "Index Snapshots" to import any previous backups. Backrest will also automatically index snapshots the first time a backup plan runs successfully.
3. Backup Plan Configuration
Create a backup plan by clicking "Add Plan" and configuring these settings:
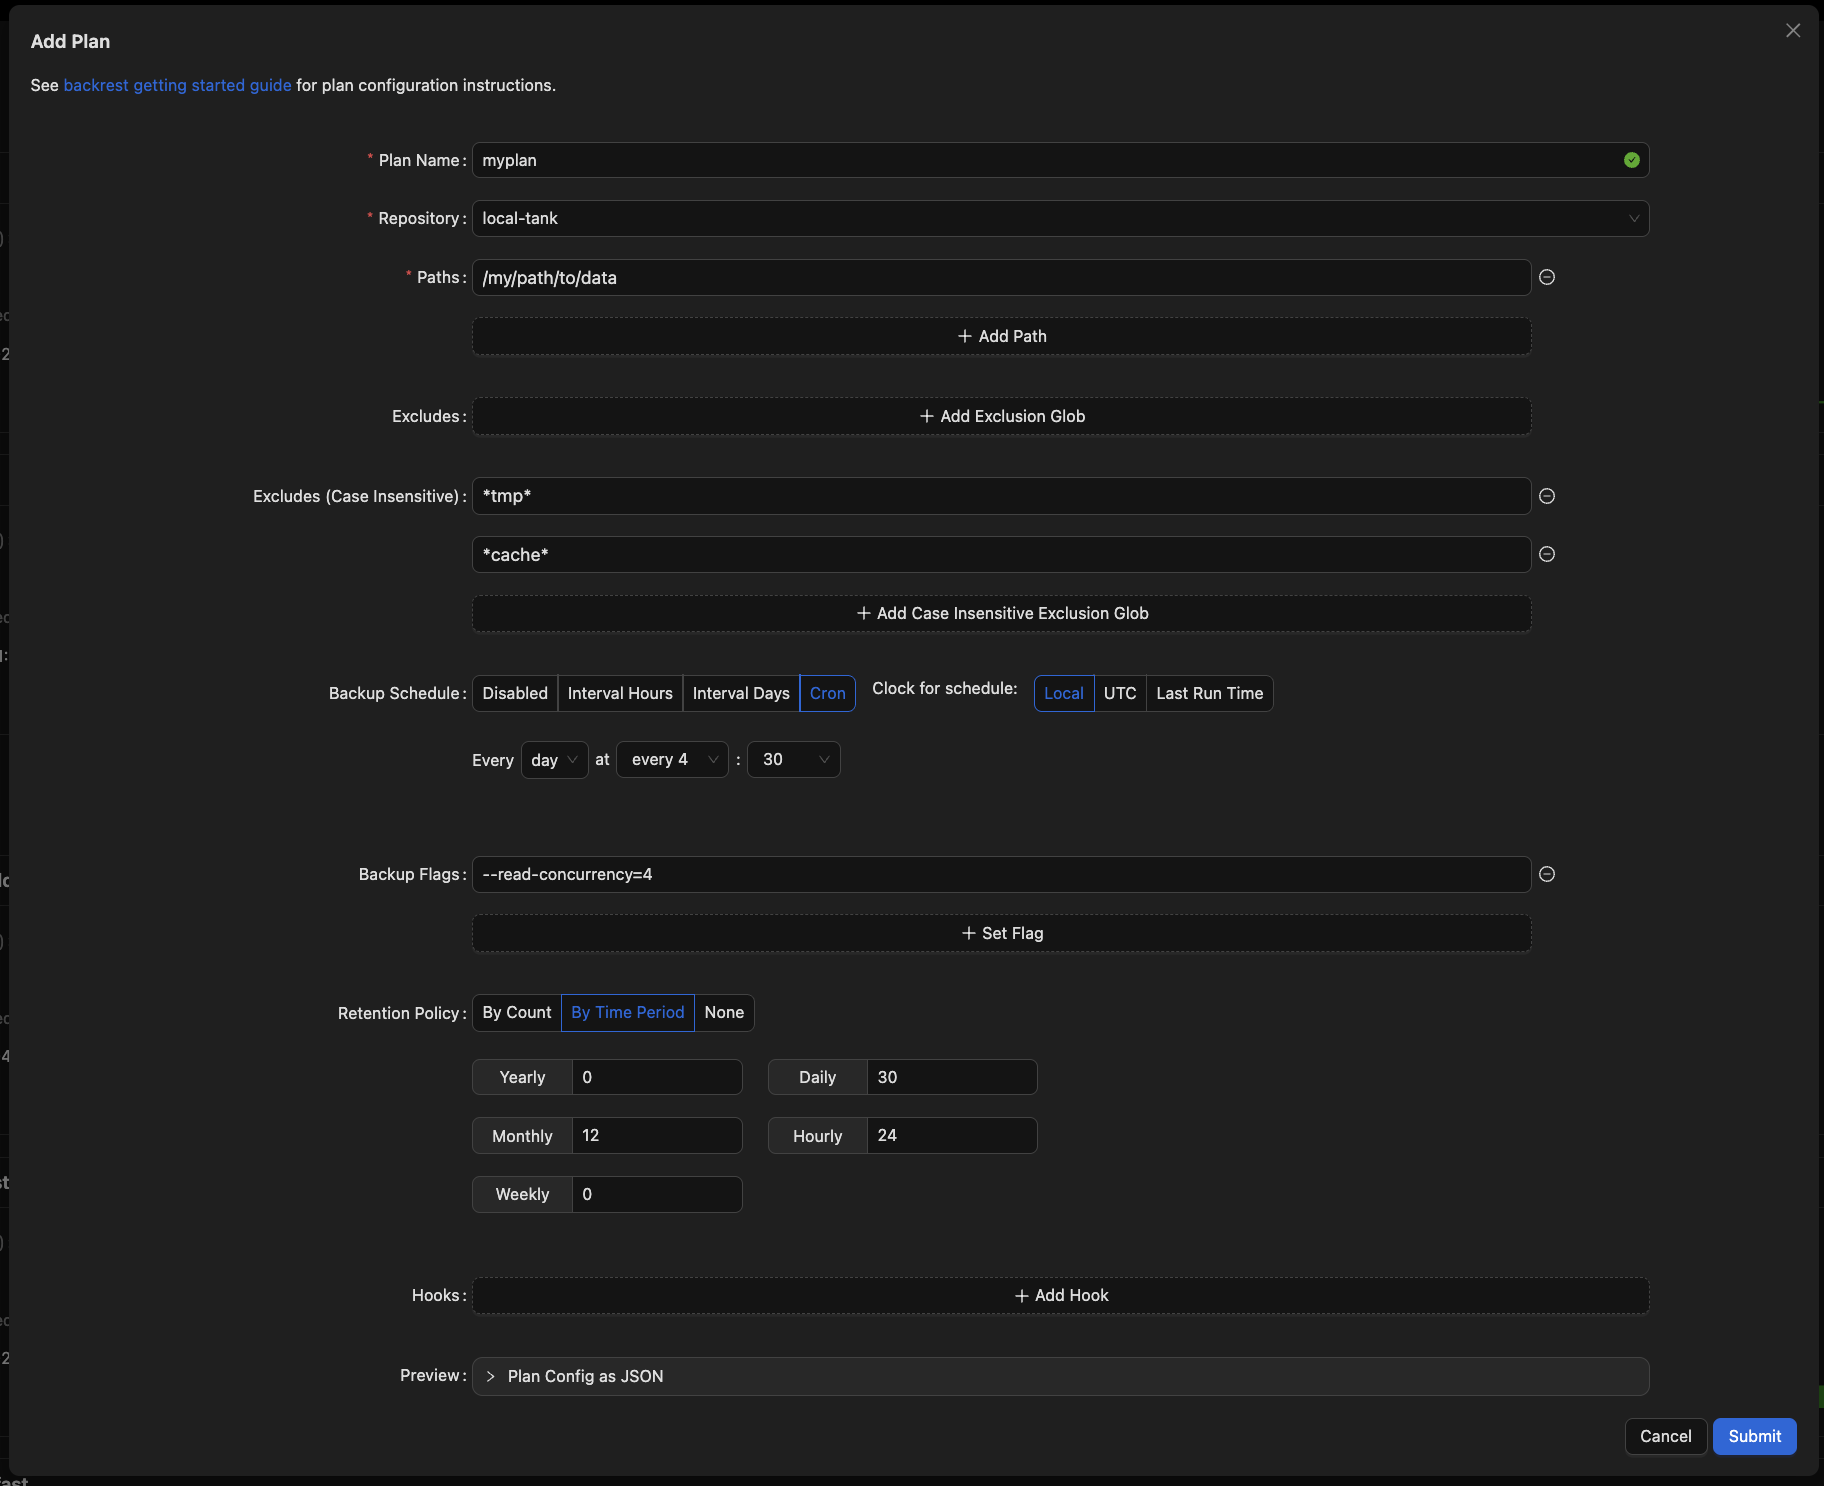
Plan Settings
Plan Name
- Choose a descriptive, immutable name.
- Recommended format:
[storage]-[content](e.g.,b2-documents).
Repository
- Select your target repository.
- Cannot be changed after creation.
Backup Configuration
- Paths: Directories/files to backup.
- Excludes: Patterns or paths to skip (e.g.,
*node_modules*).
Schedule
- Choose one:
- Hourly/daily intervals.
- Cron expression (e.g.,
0 0 * * *for daily midnight backups). We highly recommend using crontab.guru to help format your cron schedules correctly. - Clock options:
- UTC/Local: Wall-clock time.
- Last Run Time: Relative to previous execution.
- Choose one:
Retention Policy
- Controls snapshot lifecycle:
- Count-based: Keep N most recent snapshots.
- Time-based: Keep snapshots by age (e.g., daily for 7 days, weekly for 4 weeks).
- None: Manual retention management.
- Controls snapshot lifecycle:
Success! Now that Backrest is configured, you can sit back and let it manage your backups. Monitor the status of your backups in the UI and restore files from snapshots as needed.
WARNING
Make sure to save a copy of your repository credentials and encryption keys (e.g., password) in a safe place. Losing these will prevent you from restoring your data. Consider storing your entire Backrest configuration (typically ~/.config/backrest/config.json) in a secure location, such as a password manager or encrypted storage.